First published in Issue 144 of Copper Magazine
Moving to Computer Audio: A Comprehensive Overview, Part One – PS Audio
Moving to Computer Audio: A Comprehensive Overview, Part Two – PS Audio
Written by Ed Kwok
An Individual Approach to Computer Audio
Mention the words “computer audio” and it is likely to mean different things to different people. To traditional audiophiles, it could mean convenient access to their music collection, be it ripped CDs or streaming, while ultimate-performance enthusiasts would naturally marry high-resolution formats with the latest DAC technology. The younger generation may be drawn to the user-friendly way of enjoying music from a familiar smartphone interface. Computer hobbyists can find an additional way to enjoy a favorite pastime via high-res music listening, and specification enthusiasts can indulge in a race to the next dB.
The good news is that the hobby of computer audio can provide enjoyment to more people than just traditional audiophiles, and in more ways than before. A larger market results in greater variety and better-quality products at better prices, and that is good for audiophiles. The current availability of a wide range of quality DACs at the $1,000 to $2,000 price point is an example.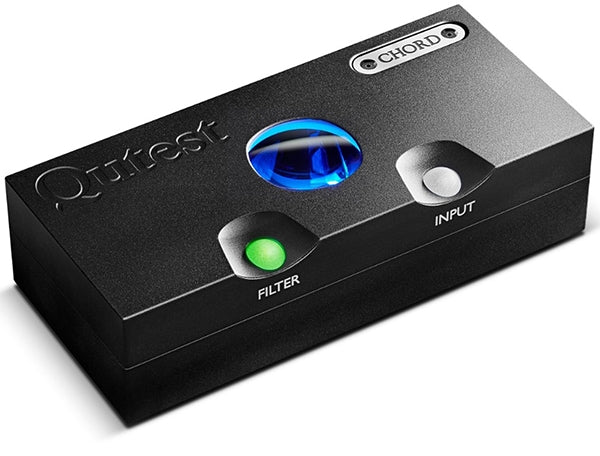
Chord Qutest DAC, US$1,695 from various retailers.
However, computer audio has also brought a hornet’s nest of sometimes complicated hardware and software setup requirements, (sometimes unnecessary) jargon, and wildly differing and often less-than-helpful advice. Plenty of arguments on chat groups lead nowhere, and many need attention from the moderator. There was less “noise” in the heyday of vinyl, when audiophiles had more consensus on the direction of how to achieve the best sound from records, and what was necessary to get there. Back then it was possible for a dedicated audiophile to audition most of the leading sources, amplifiers and speakers, and in the most effective combinations, and this carried over to much of the CD era.
In the world of computer audio, the greater complexity means that there are simply too many variables for even the most dedicated enthusiast to be an expert on everything. No one can possibly try every type of software, computer, DAC, LAN switch, cable, power supply and so on and in all possible configurations. Even a conceptually simple test between any of these can be hard to arrange, and A/B comparisons are either hard to do or impossible. For example, how would someone compare the sound quality of Tidal via two different internet service providers feeding the same hi-fi system in the same room?
In a world where no one has the same goals, systems or circumstances, then everyone is right, because they have figured out what works for them. It is my belief that in the era of computer audio, the audiophile must march to his or her own beat, so if you disagree with what I am writing, good for you!
Objectives
Why consider computer audio? Many if not most Copper readers are experienced audiophiles with a good sounding high-end system that represents a significant investment in time and money. Equally important, readers already possess the most important measuring instrument – a trained set of ears.
Some may be interested in an easy way to add streaming audio to an existing system, while others may want to go all-in and retire the CD transport, and still others may want to move towards a whole-house network setup with different systems for different music or rooms.
The desired level of technology involvement is a consideration. One should be able to enjoy computer audio without having to do computer engineering. Yet if computer engineering is your thing, then why not? This is, after all, a hobby, and if someone says you are wasting time assembling Raspberry Pis but that is what you enjoy, then you know what to do. Already we can see there is not going to be a one-size-fits-all solution.
My basic philosophy is to do what is right to maximize your own enjoyment. To make the hobby sustainable, my belief is that one should aim to retain as much of their existing system as possible. Incremental rather than wholesale changes are preferred, so that progress can be made in a step-by-step rather than a random fashion. In this article, I would like to discuss some common considerations based on my own experience.
A Personal Note
I may be the luckiest audiophile in the world. On a given day I could be treated to a Chopin Nocturne played on a Steinway Model A. How about a Bach Cello Suite played on an 1840 Kennedy cello? Maybe a Salzedo tango played on a Lyon & Healy concert grand harp? All this right in my own lounge. You see, my family members are gifted musicians and there is often live music in the house. The experience of a concert instrument unleashed at close range is astounding – once heard, it is hard to view recorded music in the same realm.
But live music in an ideal setting does not happen on demand. I also like a variety of genres, composers and artists. Like many UK audiophiles, I spent too many evenings tuning my Linn Sondek turntable to sound euphoric on a small selection of records (in reply to my good friend Dr. Adrian Wu). Imperial College, where I studied electrical engineering, had an active audio society. Manufacturers such as Meridian, Naim and Dynavector would come to demo their equipment. They must have thought we had good ears because as students we certainly did not have good credit.
When CD arrived in 1982, it did not deliver “perfect sound forever” but it did bring the enjoyment of convenience that enabled each listening session to have more music and less fiddling around. (I concede that some folks prefer to fiddle around and that’s fine.) As CD sound quality improved over the years, it brought a welcome level of consistency and enjoyment across genres. I began to buy CDs exclusively but kept my Linn.
iTunes: the First Popular Computer Audio
In 2005, along with my first iPod came my interest in iTunes which, for me, was a defining product in computer audio. iTunes was not intended to be a high-end product and its sound quality was sufficient only for casual listening, but for the first time, I could easily browse my entire CD library and find any track by artist, album or song. Whereas before I felt I did not have enough CDs and often struggled to find something to listen to, now the effect was like having a larger library at no additional outlay. I transferred my entire CD collection to the computer in lossless formats and since I kept my originals, I could use the CD transport whenever better sound was required. But, I thought, what if there could be an iTunes with sound approaching or even comparable to a CD transport?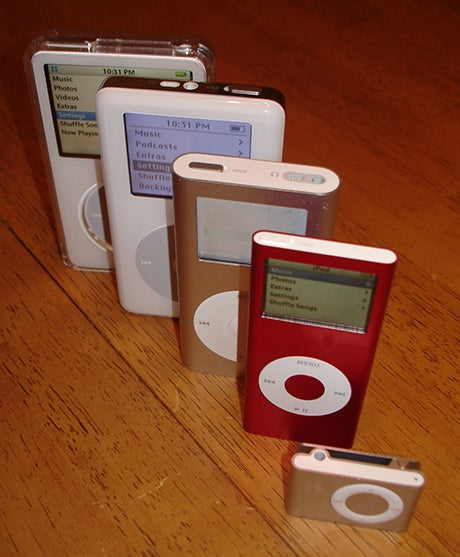
Older Apple iPod models. Courtesy of Wikimedia Commons/Chris Harrison.
High-Resolution Computer Audio Software
Bit-for-bit computer audio software such as the JRiver Media Center (PC) and Audirvana (Mac) promises to combine iTunes-like easy browsing with much improved sound quality. They were easy to set up and operate – if you could install Word, you could handle JRiver. When I changed to JRiver in 2010, computer audio sound quality was some way below a CD transport, but the combination of an entire music library controlled from the listening chair and with good enough sound quality was persuasive.
JRiver had two key audiophile features. Memory playback involves the pre-loading of an entire track from a hard drive to semiconductor memory before the first note is played. Many things happen when music is read from a disk drive. The disk spins to the angle where the track is stored, powerful motors move the magnetic heads to the correct position, and the data is read, checked for read errors and re-read if necessary. With so much going on, some audiophiles could even hear differences between different models of hard drives. With memory playback, however, the computer merely needs to feed the track from memory to audio hardware during playback. By decreasing the work performed in real time, the sound quality could be improved.
JRiver could send the audio data directly to compatible audio hardware – at the time often a professional sound card such as a Lynx or ESI – via a technology used in studios called ASIO (Audio Stream Input/Output) that gave much better sound because it bypassed Windows’ multiple layers of audio processing. Microsoft’s more recent WASAPI tries to do the same thing but does not sound as transparent in my experience. With user-friendly bit-perfect software like JRiver, computer audio began to gain traction.
Building a Music Library
The availability of a digital music library is, of course, critical. Most audiophiles have hundreds of CDs or even thousands, so this can form a good basis. Transferring (“ripping”) CDs to a computer for personal use is legal and accepted (see About Piracy – RIAA). Exact Audio Copy is a popular software utility (see Tom Gibbs’ article in Issue 143), and, for whatever software you might decide upon, a lossless audio format, usually FLAC or AIFF, should be chosen. The software should be set up to automatically fill in the fields for artist, album, track and genre by matching the CD with an online database (the computer needs to have internet access during ripping), but manual editing is sometimes required. Ripping 1,000 CDs sounds daunting, but it is not that hard once you set up a production line.
One can of course also purchase tracks, albums and entire libraries online, and some of my favorite albums are now available in hi-res. However, I think there is something wrong with having to purchase the same music three times – the first time for vinyl, the second time for CD and now for hi-res, so I have kept my purchases to new releases.
Nowadays, by far the biggest source of music for computer audio is hi-res streaming. I am a fan of Tidal HiFi because it caters to my musical tastes (classical and jazz) and the audio quality is excellent. If Tidal suits you, there is no need to rip your CDs. Simply take out a subscription to Tidal HiFi and enjoy a library of 60 million tracks at CD-quality or better. Tidal hi-res is streamed in MQA format and my experience has been very positive. The big announcement in hi-res streaming this year (2021) was the availability of Apple Music in hi-res, and audiophiles will need to figure out how best to use it and whether it has competitive sound quality.
USB DACs
Computer audiophiles have long recognized that computers are bad places in which to put audio hardware such as DACs. The inside of a computer is an extremely noisy electrical environment and the switching power supplies are designed for electrical efficiency and not sound quality. A few manufacturers have made efforts to design audiophile sound cards but with mixed results.
When high-end USB input DACs became available that allowed computer audiophiles to move the DAC outside of the computer, sound cards went out of fashion overnight. USB DACs further improved once engineers figured out how to turn what is basically a dirt-cheap data link into a high-end interface. Nowadays pretty much all USB DACS use asynchronous transfer, which improves sound quality by increasing the isolation between the DAC and the computer.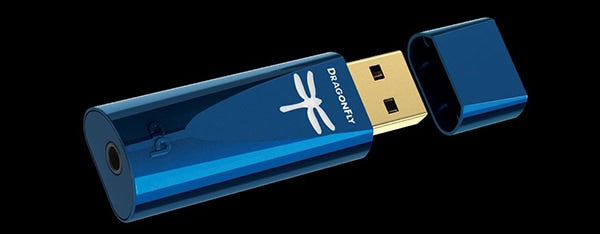
AudioQuest Dragonfly Cobalt USB DAC.
Directly Connecting a Windows or MacOS Computer to a DAC
At this point, we have a PC or a Mac running bit-perfect software directly connected to a USB DAC. Sound quality has improved but it is probably still way below a CD transport. Why is that?
If you open Task Manager on a PC or Activity Monitor on a Mac, you will see its doing hundreds of tasks at the same time. All those tasks enable office workers to get their documents done, work-from-home folks to do video conferencing, students to research their homework and everyone else to watch YouTube and play games at the same time. Very few tasks have anything to do with audio, and every unnecessary task is detrimental to sound quality because it makes the computer work harder for no gain. How can Windows or MacOS possibly compete with a dedicated CD transport that is designed specifically for music playback?
You could try using “optimizing” software that streamlines Windows or MacOS by shutting off some unnecessary tasks. But shut off too many and the computer stops working. It is simply impossible to turn Windows or MacOS into something they are not.
Running hundreds of concurrent tasks requires powerful processors. Look under the hood of any recent computer, even a laptop, and you will see at least a quad-core processor that uses so much power it needs fancy cooling. All that power is consumed by billions of transistors switching on and off at mind-boggling speeds. Imagine 30 billion tiny light switches inside your computer flipping on and off three billion times a second, happily generating electrical noise and RF interference.
Audiophile Computers
If you must use Windows, you can consider an “audiophile computer.” Potential European suppliers include Audio PC Shop and Pachanko Labs, and some suppliers use chassis from a company called HDPLEX.
Some argue that equipment upstream of an asynchronous USB DAC cannot affect sound because bits are bits. As audiophiles, you must trust your ears.
Look inside an audiophile computer and you should see a gaming-grade computer motherboard. (The best-quality motherboards are designed for eSports.) The motherboard may have some modifications, such as higher quality clock chips, to make it more suitable for audio. You should find a medium-power processor – appropriate for the job and with reduced electrical and fan noise. Quality solid state drives such Samsung are standard. No audio engineer expects you to drive your high-end DAC from a consumer motherboard so look for a separate audio-grade USB or SP/DIF/AES board. A linear power supply is preferred but adds considerably to the cost. Decent casework completes the picture. If you must use MacOS, your options are effectively limited to Apple’s product line.
With an audiophile computer, sound quality has improved to the limit of what can be done with a computer directly connected to a DAC, but in my experience may still be below what can be heard from a high-end CD transport.
The fundamental problem is that the PC industry does not make computers designed for audiophiles. Development and tooling costs are high and factories are running flat-out, shipping 500 office and gaming computers every second. To them, the audiophile market is but a rounding error – it does not pay to make computers designed for us. The audiophile computers I see advertised, even those incorporating significant engineering, are still office or gaming computers at heart. (There is a better place for these in a computer audio system, see my comments in the next installment.) In the same way that a heavily-modified production car still cannot match a specialist racer up Pikes Peak, a computer based on standard parts will have difficulty matching the sound quality of a CD transport.
Linux, and Streamers Designed for Audio
If Windows or MacOS involves an uphill battle, why not find a better alternative?
Streamers (or network players) can play music from your ripped CD library stored on disk or network drive and from your online sources such as Tidal hi-res, all at high-end sound quality. They connect to your existing DAC, can be controlled from iPad, smartphone or another device, and are not that expensive. How is this possible? Enter the Linux operating system.
Unlike Windows or MacOS, Linux is open sourced (any computer engineer can work with it) and configurable for optimum performance for each application. Your router runs Linux, and so does your smart TV, smart doorbell and your Mercedes. Did I mention SpaceX rockets? Linux’s configurability means high-end manufacturers can offer minimalist software configurations that do away with all those sound-quality-sapping superfluous tasks.
With much less processing work to be done, a genuinely lower-power processor will suffice. In a stroke of good fortune, it turns out that smartphone processors are very suitable for audio streamers. Smartphone processors are low-power (consuming only a few watts), low-noise, and suitable for linear power supplies at reasonable prices.
If a streamer satisfies your needs, it is hard to argue why you would need anything more.
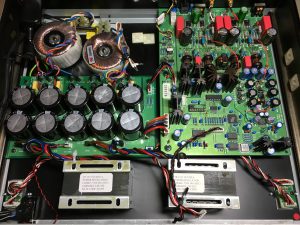
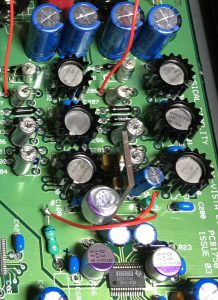
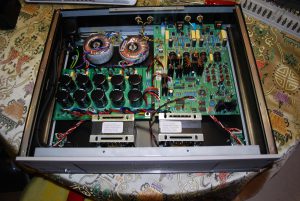
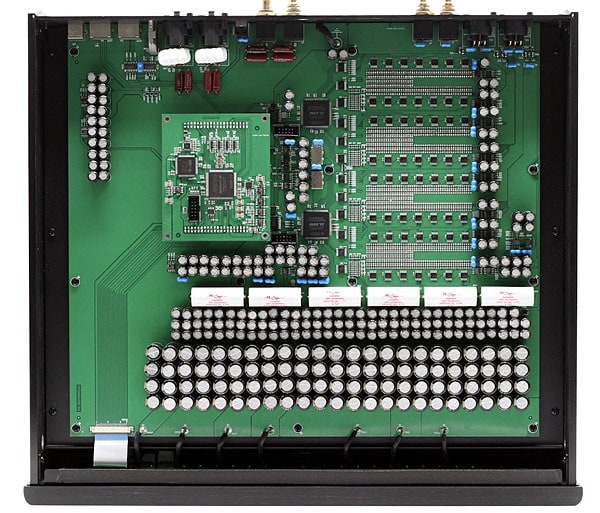
Header image: the inside of a Denafrips Terminator II DAC.

Written by Ed Kwok
The Raspberry Pi Phenomenon
The Raspberry Pi was launched in 2012 by a team from Cambridge University led by Dr. Eben Upton. He envisaged an affordable computer the size of a pack of cards for kids to learn computing with. To make it low-priced (around $50), Upton used a smartphone processor and put in just enough hardware to run Linux. It uses so little power it runs off a smartphone charger. Plug in an existing TV, borrow a keyboard and mouse and one can get online.
Dr. Upton aimed to sell a few thousand. As of 2021, they have sold 40 million. Raspberry Pis are amazing not only for their low cost but also for their high quality – they are field-proven in extreme environments. Near-space balloons? Check. Volcano monitors? Sure! Underwater drones? Naturally!
Computer audiophiles figured out that here was an ideal platform on which to build a streamer. The genius of a Raspberry Pi is its GPIO (General Purpose Input/Output) connector, which accepts plug in boards (“hats” in Pi language). An SP/DIF hat turns it into an SP/DIF streamer; connect a 24/192 DAC hat and you have hi-res audio capability. Add a decent linear power supply or two (one for the Pi and one for the hat) and you have a budget high-end component.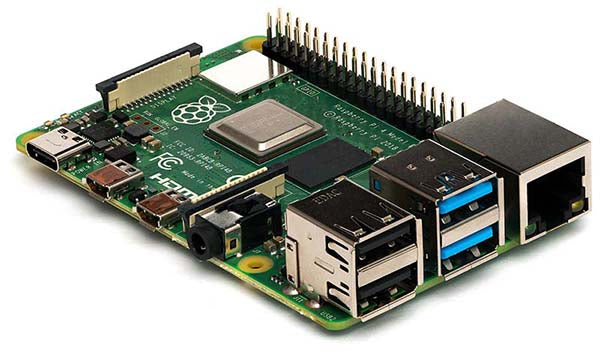
A wide range of hats are available at different price points. Suppliers such as Allo provide step-by-step instructions so you do not have to be a computer engineer. If you can follow a cookbook, you can make your own Pi audio component over a fun weekend, including hardware assembly and downloading and installing the software.
If all this sounds a bit DIY, it is. Or was, until Bryston announced the BDP-Pi in 2016. The latest Bryston BR-20 is also Pi-based; you can see the unmistakable connectors on the back panel.
I should warn you – once you have tasted the Raspberry you may become addicted.
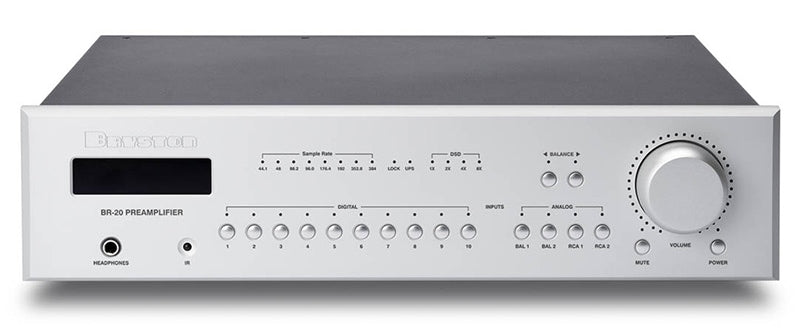

Bryston BR-20 preamplifier, front and rear views.
Endpoint Streamers – a Minimalist Approach
If a streamer can beat a Windows computer in sound quality by virtue of minimalism, how about further reducing its hardware footprint? Enter “endpoint streamers” such as the Sonore microRendu v1.5.
Endpoint streamers are designed to further increase sound quality by doing almost nothing, in a good sense. The heavy lifting of running the music library, user interface, Tidal and audio format conversion is done by a separate powerful music server computer somewhere on a user’s LAN (local area network).
The endpoint streamer receives music data over the LAN from a server, and merely feeds it to a DAC. If you believe in minimalism, this is for you.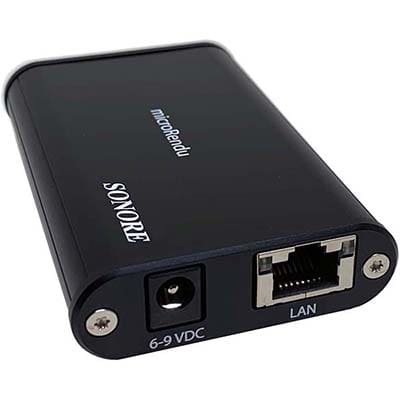
Sonore microRendu v1.5.
A USB DAC needs a USB endpoint streamer. If you have a high-end DAC from 10 years ago, an SP/DIF endpoint streamer will do nicely. Also, if you happen to be looking for a new DAC, you could choose one with a built-in endpoint streamer and save yourself an extra component.
Now that you have your endpoint streamer, you need software to make it work and a music server to partner it.
Roon
Roon is a networked audio playback software whose architecture allows the use of endpoint streamers. A Roon Server computer does all the heavy lifting and feeds music data over the LAN to endpoint streamers for audio output.
One music server can serve many endpoints. If you have several DACs, you can partner each with its own endpoint streamer and connect them all. You can easily switch between DACs for each track depending on your mood. Those running a tube DAC loaded with precious NOS tubes could configure a solid-state DAC for casual listening. I run three DACs in my main system.
You can fill your house with music by installing, for example, high-end endpoints in the listening room and more economical endpoints in the kitchen, bedroom, even bathroom. They can all be playing different tracks simultaneously. You can control all of them from your iPad, phone, computer or other device and because the system is LAN-based, everything works all the time and there is no need to re-connect everything as you would have to do when using Bluetooth.
Roon will accommodate a direct connection between a music server and a DAC, but with significant loss in sound quality as previously explained. Roon supports hi-res streaming with Tidal and Qobuz and I wish they would add iTunes in future releases.
Roon is easy to configure and can grow as your needs change. I have used Roon since 2017, with excellent results.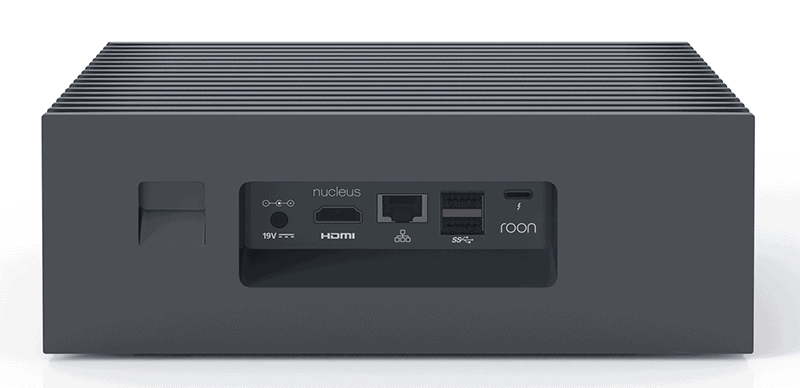
Roon Nucleus music server.
Roon Server Software
Roon Server software is best run on a dedicated computer. There is debate on whether differences in the music server make an audible difference. Theoretically, because the music server is separated from the DAC by the endpoint, there should be no difference. Roon themselves say there is no difference. This is another one of those things that the audiophile must decide for himself.
There are four main versions of Roon Server software: Windows, MacOS, Linux and Roon Optimized Core Kit (“ROCK”).
The Windows and MacOS versions are self-explanatory.
Linux versions are available for PC compatibles, QNAP NAS (network attached storage) and Synology NAS. Running Roon Server on a NAS is economical, but a NAS is not a dedicated computer.
ROCK comprises a Linux operating system optimized by Roon, bundled together with the Roon Server software. Install this on a PC-compatible computer and one is ready to go.
In my system, the sound quality of ROCK is excellent and far better than Roon Server for Windows (using the same computer hardware). I have also tried Roon Server for Synology NAS but with disappointing results. I offer no scientific explanation for these observations.
Roon Server Hardware
ROCK is an excellent choice but it is certified for use only on Intel NUC computers.
NUCs are little 4-inch square PC compatibles designed for saving space. They can return decent benchmark scores but are not designed to offer consistent speed or sustained performance. This is because their compact laptop-class hardware must throttle down as much and as often as possible to avoid exceeding fairly low power and thermal limits. This is achieved by varying the frequency of the processor clock – lower frequency saves power when the system is idling and higher frequency provides the speed to do work. This is fine for Excel, but if you believe a music server’s processor should run at a fixed speed, then you might not like NUCs.
Computer enthusiasts have successfully run ROCK on a wide range of non-NUC, PCs. These are known as “MOCKs” in the Roon community and there is a thread on the Roon forum dedicated to it. You could roll out that spare desktop PC, as long as it’s not more than around eight years old. There is a good chance it will work and should provide good enough sound quality to get a taste of computer audio before deciding to spend significant money. If you’re computer savvy, I recommend you disable the computer’s power-saving features so that the processor runs at a constant speed. Also, putting the computer in another room will eliminate being bothered by fan noise.
If your interest in computer engineering is not high, an excellent option is Roon’s own Nucleus server. It is based on the Intel NUC board but has been significantly improved to offer high-end sound. The price includes dealer/manufacturer support. Partner it with a decent linear power supply. Audiophiles who require an ultimate Roon server could investigate the likes of LampizatOr or Pachanko Labs. However, the benefit of a super-high-end server on Roon sound quality is not well documented at this time of writing.
Differences in sound quality from a “decoupled” server are hard to understand scientifically and therefore hard to predict. It will be necessary to audition the setup in your actual system. In my system, ROCK running on a self-built computer handily beats ROCK on an Intel NUC7i5.
Optimizing a DAC Using Roon’s DSP
The Roon Server and endpoint streamers are now filling the house with music. It is time to tune up the DACs by using format conversion (“DSP” in Roon language). This is mainly for hi-res audio listening, because 44 kHz and 48 kHz formats should be streamed to the DAC in bit-perfect mode in most cases.
Look at their data sheets and you will see that even the best ESS, AKM and Burr-Brown and other DAC chips have lower distortion at lower sampling rates. Some audio DACs, due to their implementation of their DAC chips and other internal circuitry, have good sound only at one sampling rate. For example, my Musical Fidelity Tri-Vista 21, with its rudimentary 96 kHz upsampling circuit, comes alive only when you feed it exactly 96 kHz (to intentionally bypass its internal upsampling).
In my system, on 24/352 material, the superb-measuring RME ADI-2 Pro has a more real-life sound at a downsampled 176 kHz while bit-perfect 352 kHz source material creates a bigger soundstage but with a slightly artificial sheen. This could be due to a weakness in the RME or something else in my system, or could be a system-matching issue. But listening at 176 kHz or 192 kHz is best.
The AudioQuest DragonFly Cobalt can be amazing at 88 kHz or 96 kHz especially on MQA, provided you feed it quality power via a dedicated circuit ( such as the iFi iDefender+). Plugged directly into a Raspberry Pi USB port, the Cobalt’s 88 kHz or 96 kHz performance falls apart, to the extent that it sounds better at a downsampled 44 kHz or 48KkHz.
The idea is to find the best sampling rate for each DAC in your system. Roon’s settings menu is easy to use and quick enough to do A/B comparisons. It is best to use a 352 kHz or 384 kHz track so you can try it at bit-perfect, 176 kHz or 192 kHz and 88 kHz or 96 kHz. Upsampling is rarely recommended, because it makes everything work harder to provide no additional musical information, but why not try it just to make sure? If you prefer DSD DACs, Roon can convert PCM to DSD on the fly and can even convert between DSD rates.
Go ahead and spend an afternoon finding the sweet spot for each DAC. You may find your DAC never sounded so good. Once you have set up each endpoint/DAC, it will automatically receive its favorite format regardless of what track you play. Roon performs DSP in 64-bit floating point on the fly and if you keep to power-of-two sampling rate conversion (sampling rate conversion in multiples of two, I doubt whether you will worry too much about any quality reduction.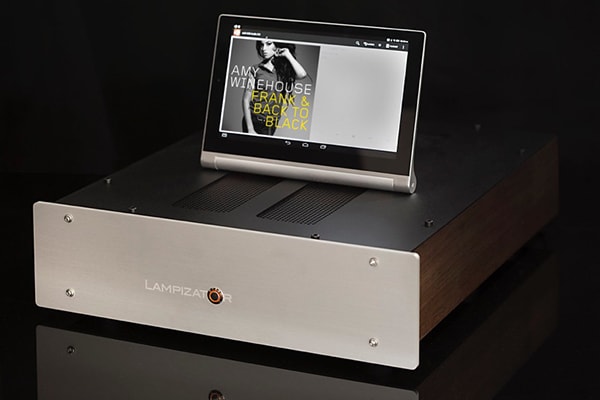
LampizatOr Super Komputer music server.
Computer Networks and Switches Can Matter
If you stream Tidal, it goes without saying that the best internet service available for your house should be installed. In my case it is 1000M fiber to the home. Use a quality router with plenty of processing power. Gaming or SOHO (small office/home office) routers start at $200, which is a lot for a home router but cheap for audio.
Computer audiophiles try to put their audio devices on a separate LAN on the home network to avoid as much as possible dear son’s YouTube or World Of Tanks running on the same piece of wire as your music and using up data resources. The best implementation is to join the audio LAN to the rest of the network as near to the main router as possible.
The audio LAN should use a network switch that is known to work well for audio, because the switch has an audible impact. The D-Link DGS-108 is widely accepted by audiophiles. Better audiophile-approved switches (often based on the DGS-108) are available but the more expensive models may be overkill for systems costing under $10,000. Gaming switches, although high performance, are not automatically better and can sound worse in my experience. In all cases, replace the included wall wart power supply with something better.
As with USB cables, network cables matter and I and others find that the use of different cables can be clearly audible. However, more expensive is not automatically better. In the systems with which I have experience, cat6 from a quality manufacturer such as 3M beats cat7. This is an area that needs investigation. If you go with 3M cat6 round cables, I doubt you will go far wrong. Avoid flat cables as they generally have inferior sound.
Do Not Rule Out Wi-Fi
Engineers (including myself) will tell you that wired LAN is preferred over Wi-Fi for critical networking applications due to faster, more consistent and more reliable data transfer. But high-end audio does not always follow scientific theory.
In my system, Wi-Fi surprisingly gives better sound quality. Both my Ethernet and Wi-Fi are the best available for home use. One explanation is that since there is no longer any physical connection between the (noisy) computing devices and the (quiet) audio devices using (wireless) Wi-Fi , perfect isolation has been achieved. The science does not really matter to me because I know what I hear. If your endpoint streamer has Wi-Fi, why not give it a try?
Finale
If you have gotten this far – congratulations! You have a fully working high-end computer audio-based system. On hi-res material, it has the best sound you have heard in your room. When listening to CD-quality (16-bit, 44.1 kHz) material you are matching the sound quality from your CD transport. You have managed to keep most of your existing equipment and you carried out as much computer engineering as you care to enjoy, or avoid.
You succeeded because you relied on a background of years of experience in high-end audio and on the only measuring instrument that really matters: your ears.
Chat groups are full of keyboard warriors who do not want to invest the effort or do not have the means to play in the high-end arena. Professional engineers understand that science and theory are merely a way to approximate the real world. If the world always worked according to science, all products would be perfect and there would be no need for prototyping or testing, or improvement.
No one doubts that Boeing engineers know aircraft science and technology like the back of their hand. Yet the fact that they still test their airplanes rigorously shows the acceptance by even the best engineers that science only gets you part of the way. Real-world experience will tell the rest.
Welcome to the world of high-end computer audio.
Header image: RME ADI-2 Pro AD/DA converter.
